2022/09/07 - Update: You can now use the official DecisionVault Zapier integration.
--
To set this up you'll need to be on a paid Zapier plan (because you need access to their "webhooks by Zapier" actions)
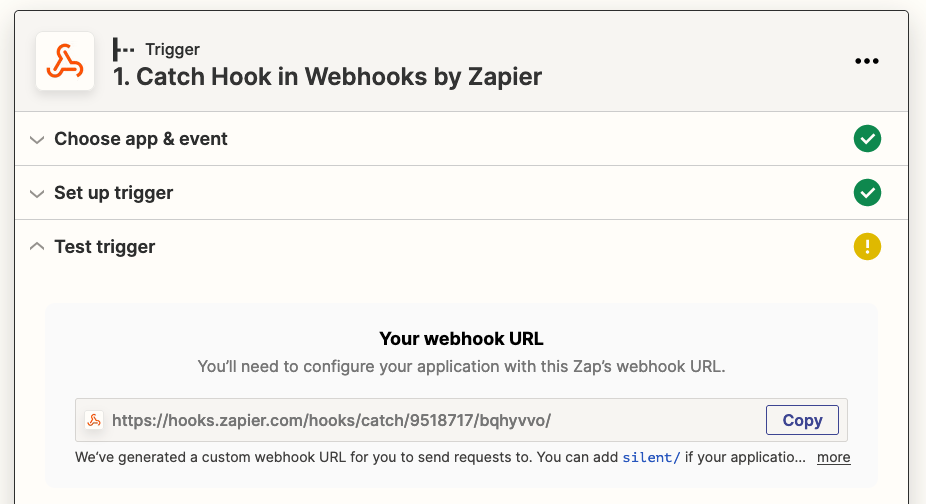
1. Create webhook in Zapier
Start a new Zap and add the "Catch Hook in Webhooks by Zapier" trigger:
2. Set up webhook in DecisionVault
Take the provided link and add it to the webhooks integration in DecisionVault:
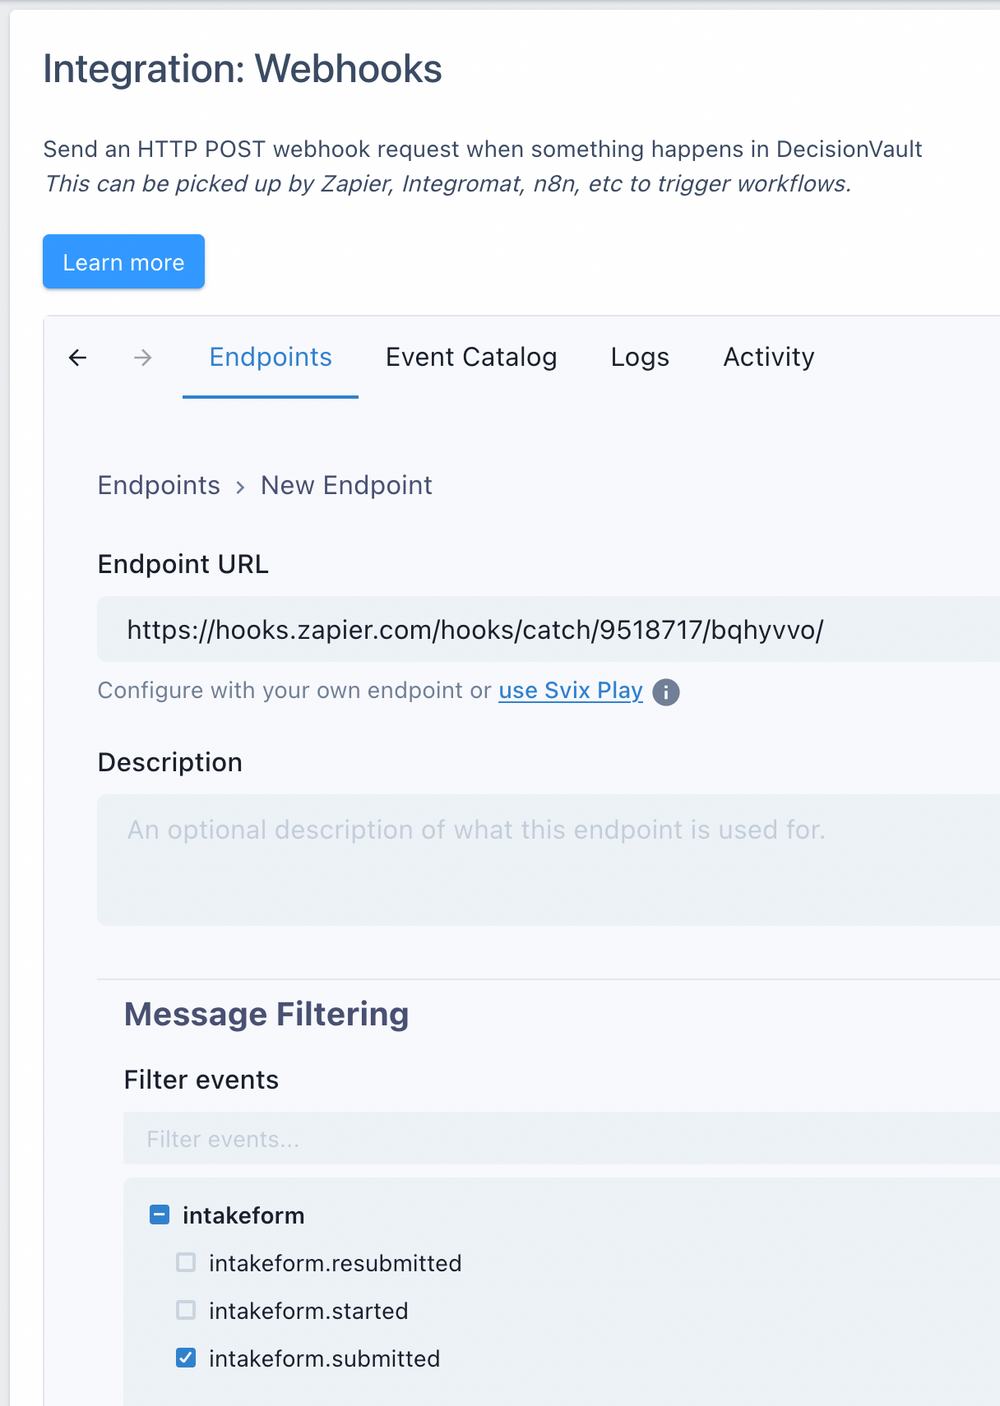
Then create a new testing matter, fill in a dummy contact and submit the questionnaire. Zapier should receive the event and then you can use the variables to set up the next steps of your Zap.
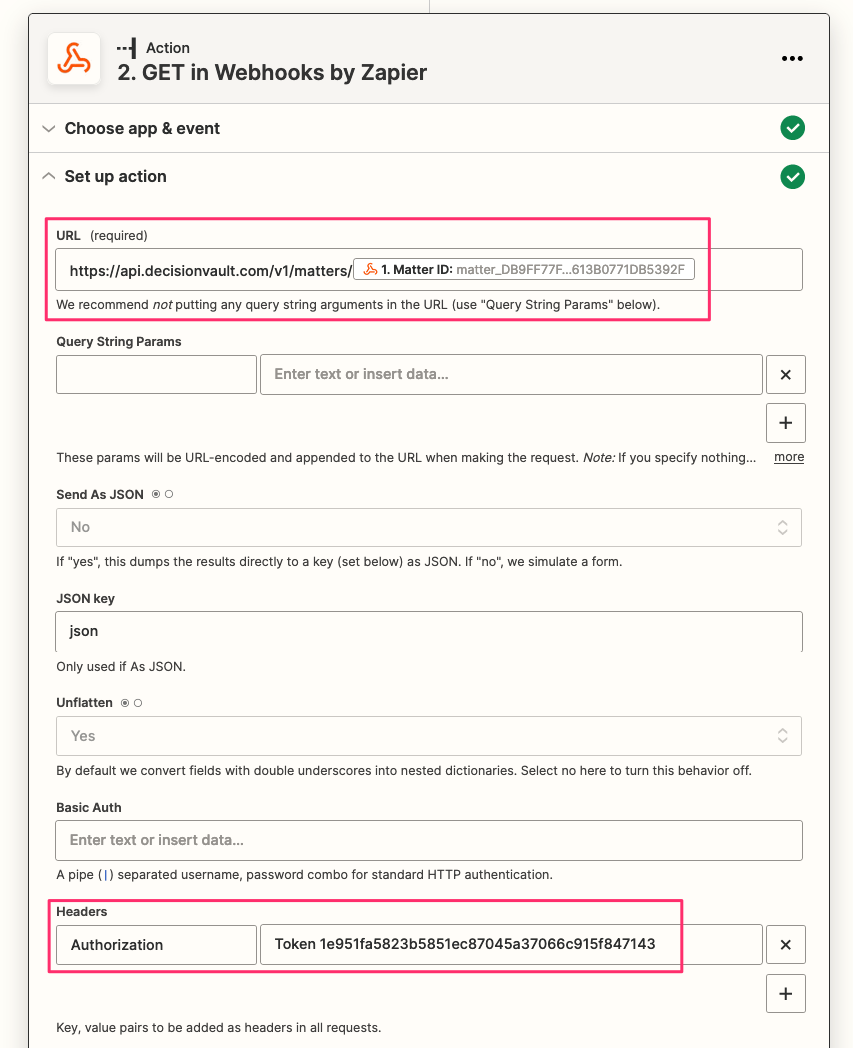
3. Use the Matter Identifier to query the DecisionVault API
Add an action as the next step in Zapier, and make it the "GET in Webhooks by Zapier" action, and fill it in so the Matter ID from the webhook is used to query the DecisionVault API for that matter. Make sure you create an API key in DecisionVault under integrations > Developer API, and include it as "Authorization": "Token <api key>"
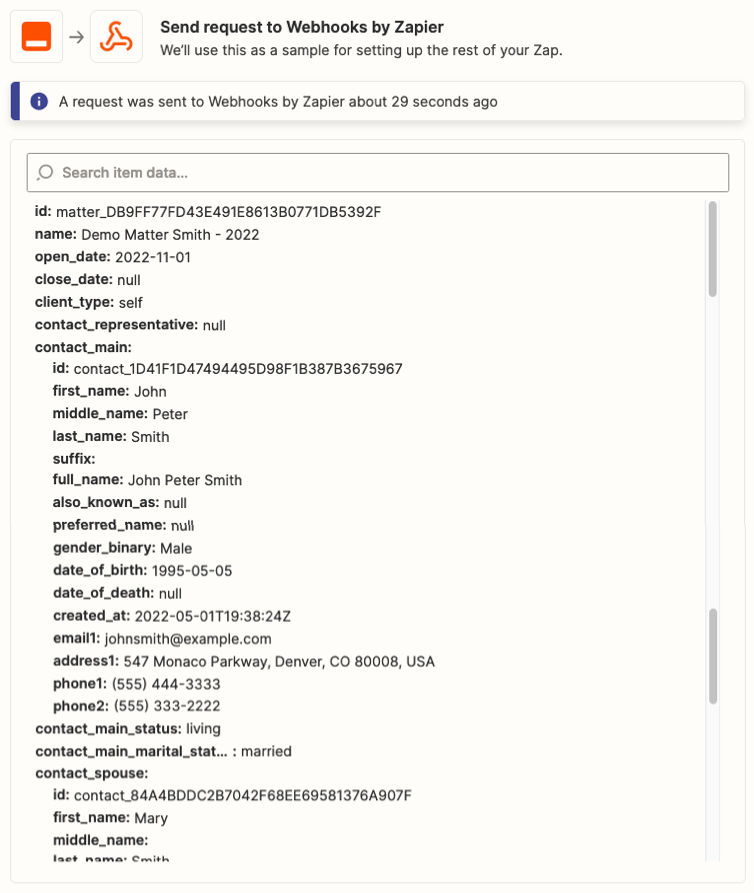
When you let Zapier retrieve the matter in the testing step you'll see that you get information back on the matter, and on the main people on the matter:
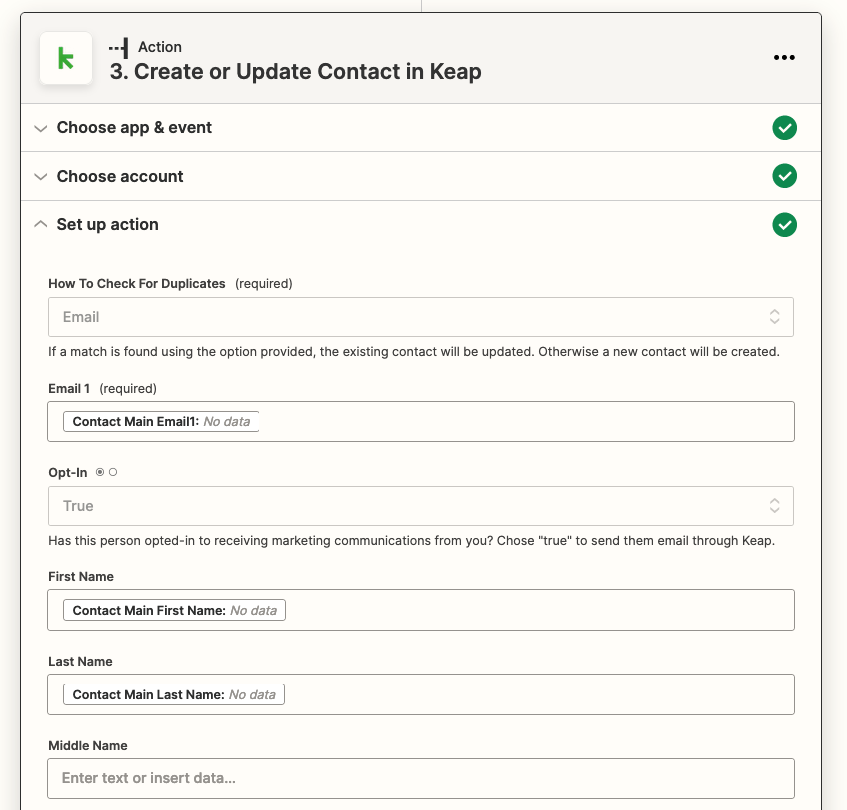
4. Use the information in other Zap actions
Now that you've pulled this information you can use it in other Zap actions - for instance we can create or update a contact in Keap:
Learn more
The full API documentation is available here:
https://api.decisionvault.com